

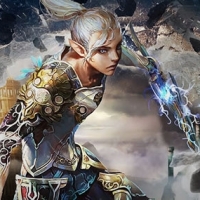


Lost Ark's Forge of Fallen Pride is the final Abyssal Dungeon in the Ark of Arrogance series, but what should players know about its mechanics before they enter it?
The second half of the Ark of Arrogance from the Lost Ark gold. The Forge of Fallen Pride, an Abyssal Dungeon located in the Yorn region, is a bit of an outlier. For the most part, it's a lot less complicated mechanically than the level before it (the Road of Lament), and it's arguably even easier than the Abyss Dungeon that came before it (the Phantom Palace).
Still, this actually adds to the enjoyment of the experience, as this Abyssal Dungeon with a minimum item level of 840 is quick to farm for that sweet chunk of gold gain per week. Amaus The Steel Floor and Kaishur of the Ancient Furnace are the two bosses that cheap Lost Ark Gold store players can expect to face in this Dungeon, so prepare to fight hard. Here's what you should know about the game before you start playing.
Guide for a Quick Refresher
In contrast to other Abyssal Dungeons, the Forge of Fallen Pride isn't one that many players return to for a refresher on the mechanics of the dungeon's mechanics. If you aren't interested in reading the entire comprehensive guide, here are the most important points to take note of: 1.
Four sections make up the Forge of Fallen Pride: a short mob-clear, the Amaus fight, a longer mob-clear that concludes with a fight against two Elite Elementals, and the final fight against Kaishur. The first boss, Amaus, is a piece of cake to defeat. When players notice the enormous red circle surrounding them, they should get away from the rest of the party until the circle explodes, at which point they should return to Amaus. Additionally, when Amaus summons its Wyverns, devote your attention to eliminating them as quickly as possible before returning your attention to Amaus.
While it does have a Wipe mechanic like the first Boss, the second Boss, Kaishur, is even more simplistic in its mechanics. After summoning a white and red replica of himself (and an accompanying message appears on screen), keep an eye on Kaishur's raised right hand. He'll summon either a red or a white orb and send out a shockwave of the same color (which does no damage) to signal his arrival. Kill the clone of that color as soon as possible and bask in the eerie aura it emits. Kaishur will unleash its Wipe attack, but if the party kills the correct clone and stands in the correct aura, they will be invincible. In addition, Kaishur has a basic Stagger Check mechanic as well as a Counter-Attack mechanic to use. While the Stagger Check is as common sense as it gets, there is only one thing players need to know about the Counter Attack: they must stop attacking when Kaishur has a bright red shield surrounding him.
There aren't any consumables worth using up in this Abyssal Dungeon, but if players are having trouble, items such as Panaceas and Taunting Scarecrows should be able to assist them.
Combat with Ugo's minions in the first section
The first section of the Forge of Fallen Pride is very similar to the first section of the Road of Lament in that it is a straightforward mob-clearing section. Ugo's Minions are a relatively short section of the Dungeon, and players must clear it out before proceeding to the first boss of the Dungeon, Amaus.
The second section is titled Amaus, or The Steel Floor.
Amaus, the most straightforward of all the bosses in the Ark of Arrogance, is about as straightforward as they come. There are two gimmicks that the party must be aware of: his Explosive Auras and his Summoned Wyverns, both of which must be avoided. These mechanics, on the other hand, do not require any significant memorization.
Auras that are explosive
Amaus will use these Auras at random intervals throughout the course of the fight. -The way it works is that he'll create these massive red circles around a player's body, as well as red orbs above their head. Whenever three of these red orbs appear in a row, the Aura explodes, dealing no damage to the player who is currently inside it, but a significant amount of damage to anyone else who happens to be standing in it. This is usually avoided by having any members of the party who have the Aura flee across the arena to the opposite side of the arena from Amaus until the Aura explodes, after which they can rejoin the fight.
Wyverns have been summoned.
At two points during the fight (when Amaus reaches his eighth and fourth remaining HP Bars, respectively), the Boss will summon two Wyverns (for a total of four) to come down and join in on the action. They have a variety of their own attacks, the majority of which apply stacks of the Burn Debuff to the target. However, in all honesty, the harm they cause is extremely minimal.
Despite this, players should eliminate them as soon as possible because they grant a buff to Amaus after remaining alive for a specified period of time. Amaus' defense, attack speed, and movement speed are all increased as a result of this buff, making a simple fight much more annoying. As soon as these Wyverns appear, the party's attention should be drawn to them and maintained until they are defeated.
Third Section: Defeating the Demons Who Are Standing in the Way of Progress
Having enjoyed a pleasant, leisurely elevator ride, the group is then transported to another lava-filled area, where they must clear out any mobs that may be present. This is another straightforward section of the Dungeon, with only a few jumps and a final battle against some Ancient Guardian Constructs to contend with. It should be a smooth sailing experience from beginning to end.
The fourth and final section is titled Kaishur of the Ancient Furnace.
Finally, players have reached the final boss of the Ark of Arrogance Abyssal Dungeons, who happens to be. . . surprisingly easy. Kaishur finds himself in an unusual position, because, according to the lore, he should be the culmination of all the battles that have gone before him, but in reality, he isn't even close to as difficult as Kyzra was. All that is required of players is that they pay close attention to three things: his Clone Summon Wipe Mechanic, the Counter-Attack Shield he summons, and his Stagger Check.
Clone Summon Wipe (also known as Clone Summon)
This is the primary mechanic that players will need to be on the lookout for during their battle against Kaishur, and it will always occur at his 16th and 8th health bars. In the event that Kaishur reaches either of the two HP triggers in the arena, he will move to the center of the arena and summon two Clones on either side of him, one red and one white in color. As with the Necromancer Sigmund in the Ancient Elveria Abyssal Dungeon, when Kaishur summons these clones he will unleash a red or white shockwave of energy, depending on the color of the clones. This informs the party as to which one they will be required to kill.
To figure out which color of clone they need to defeat, players can also look at the small orb in Kaishur's hand. Once the correct clone has been identified, the entire group must work together to eliminate it as quickly as possible. When a clone dies, it leaves an aura on the ground where it falls, and the entire party must remain within this aura until it is destroyed. After approximately thirty seconds, Kaishur unleashes the Wipe attack on the enemy. As long as the party is in the correct aura, it will have no effect on them, and the fight will continue.
Here are a few things to keep in mind:
At a glance, it's difficult to tell what color the clone is (especially with friendly particle effects enabled), so pay attention to their wings, which are much more visually obvious than their skin.
If you ping the correct clone, it will be even easier for the party to find and destroy it.
The clones have their own move sets, which include a large number of stun- and freeze-based attacks. Keep an eye out for their attacks while you're tearing them apart.
It is only the party members who do not make it to the aura in time that are killed when Kaishur uses the Wipe attack on them. Unlike future Abyssal Dungeons, which are expected to introduce the all-or-nothing Wipe mechanic in the teased upcoming content, this is not the case here.
Shield Against Counter-Attack
Despite the fact that this mechanic isn't as complex as the Summoned Clones, it has the potential to wipe out an unwary party if they aren't careful, depending on their current health and item level. Kaishur has a chance to use this defensive manuever sporadically throughout the fight (usually only once), which will cause a red shield to appear around him and protect him. As soon as this Shield is summoned, all members of the party must cease all offensive activity. If Kaishur receives a certain number of hits or suffers a certain amount of damage while this Shield is active, he will launch an arena-wide Counter-Attack that deals significant damage to everyone in the arena.
Wait for the Shield to naturally dissipate before continuing the battle with it. Until after Kaishur has used this move, classes that deal lingering damage or have skills that actually hit a few seconds after casting, such as the Artillerist, must be cautious with their attacks.
The Stagger Check is an extremely important mechanic.
Kaishur, like the majority of the other major Abyssal Dungeon bosses, is vulnerable to Stagger Check. Fortunately, unlike bosses such as Punika's Albion in Oreha's Well or Brelshaza in the Phantom Palace, failing this Stagger Check will not result in a massive buff or a party wipe, but it will deal significant damage to your party.
It is possible for Kaishur to activate his Stagger Check at any point during his fight, so keep an eye out for when that orange bar appears beneath him. Prepare to use any and all Stagger Skills available to you in order to drain it as quickly as possible.
Consumables and Builds that are recommended
Although the Forge of Fallen Pride does not necessitate the use of a large number of Consumables, there are a few that are particularly useful for those who wish to complete it as quickly as possible.
HP Potions are an unavoidable necessity, especially for new players.
Whirlwind Grenades can be used to counteract Kaishur's Stagger Check attack.
Panaceas are beneficial for all of the Burn Debuffs that appear throughout this Dungeon, but they are not required.
Scarecrows that taunt the party can be beneficial for both Kaishur and Amaus, as they can divert aggro away from the party while they concentrate on killing the Wyverns (for Kaishur) and Clones (for Amaus) respectively.
In order to find the most optimal build for Dungeon runs, players can combine their favorite Engravings, well-Faceted Ability Stones, and all Accesories in any combination.